
Create a Backend for Xamarin.Forms using Azure Mobile App's Easy Tables
Just last monday, I was asked if I could give a talk anything about Azure for Global Azure Bootcamp. At first, I wasn’t very sure what to talk about since I was focusing on Mobile .NET and I have a tight schedule last week. But then, I remembered that I will train STI college professors about Azure Mobile App and how to integrate it to a Xamarin.Forms application, so why not talk about it. Plus, I also remembered that there is this one thing that I wanted to share about Azure Mobile App that can probably make some of the audience’s jaw drop… and it did!
I’m talking about Easy Tables aka No-Code API/Table. It makes data storage backend creation so easy and fast. As a matter of fact, when I demoed it, it only took me roughly 13 minutes and I was even explaining every step that I did! If I wasn’t, the setup would’ve been finished in less than 10 minutes. That’s how easy and fast Easy Tables is. I mean let’s be honest, we want to setup our data storage backend as quick as possible, so we can focus on developing our client app immediately. That’s what Azure Mobile App is offering us.
Creating an Azure Mobile App
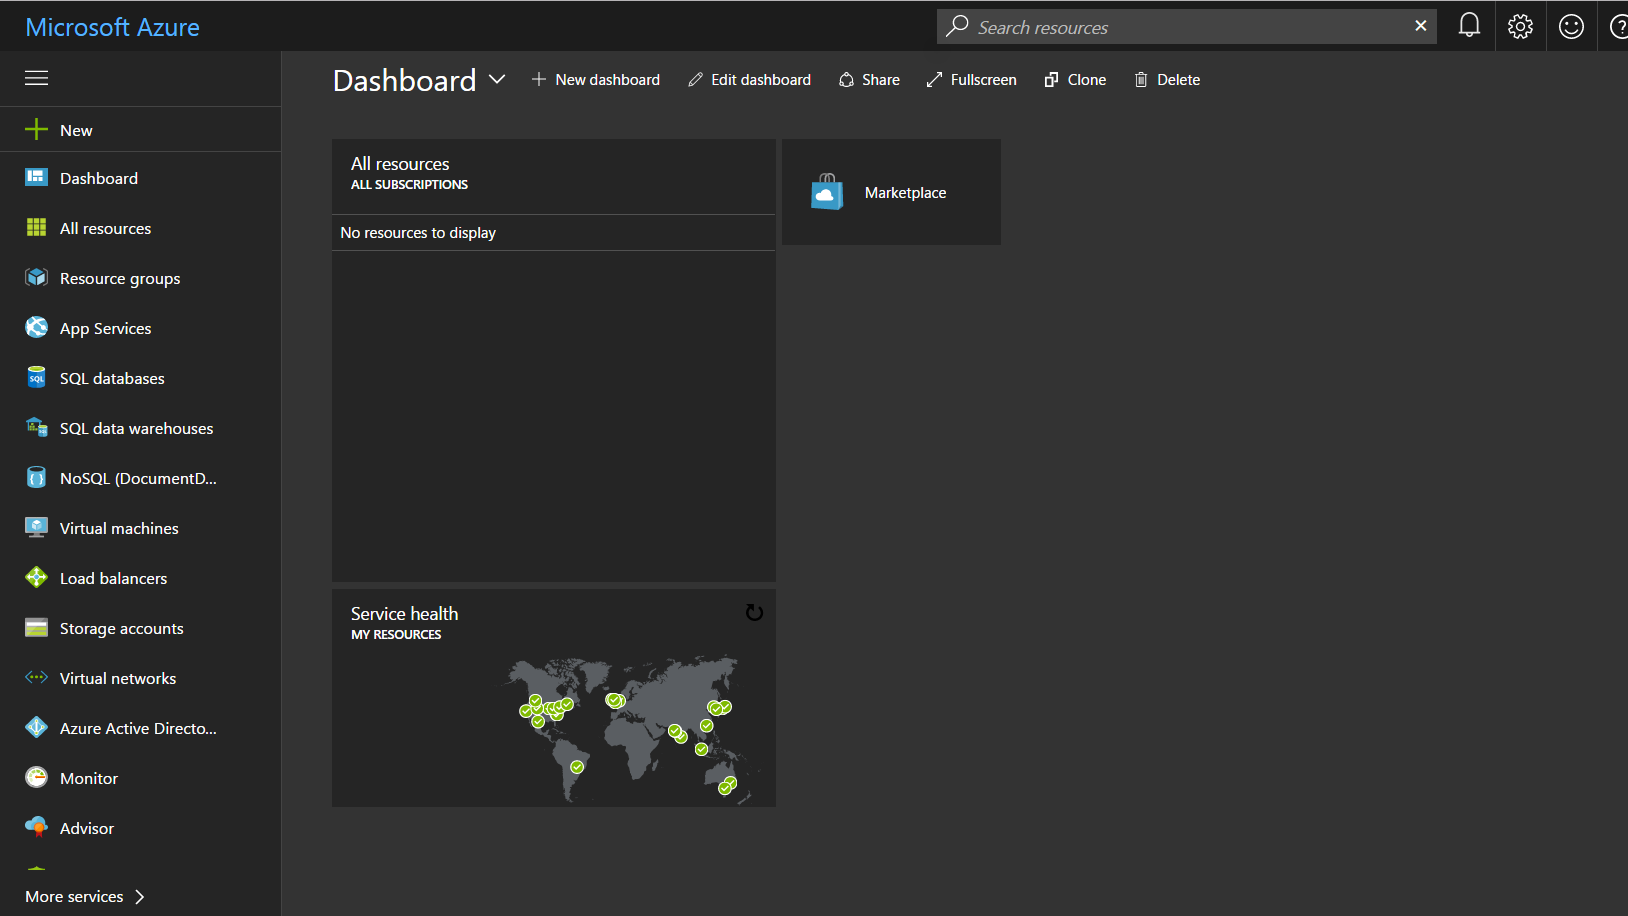
Firstly, in order to use/try out Azure services, you need to have an Azure account. If you don’t have any Azure account, you can join the Dev Essentials program to acquire a $25/month Azure credits for 12 months. Once you have an Azure account, just log it in the Azure portal and you should now see your Azure Dashboard:
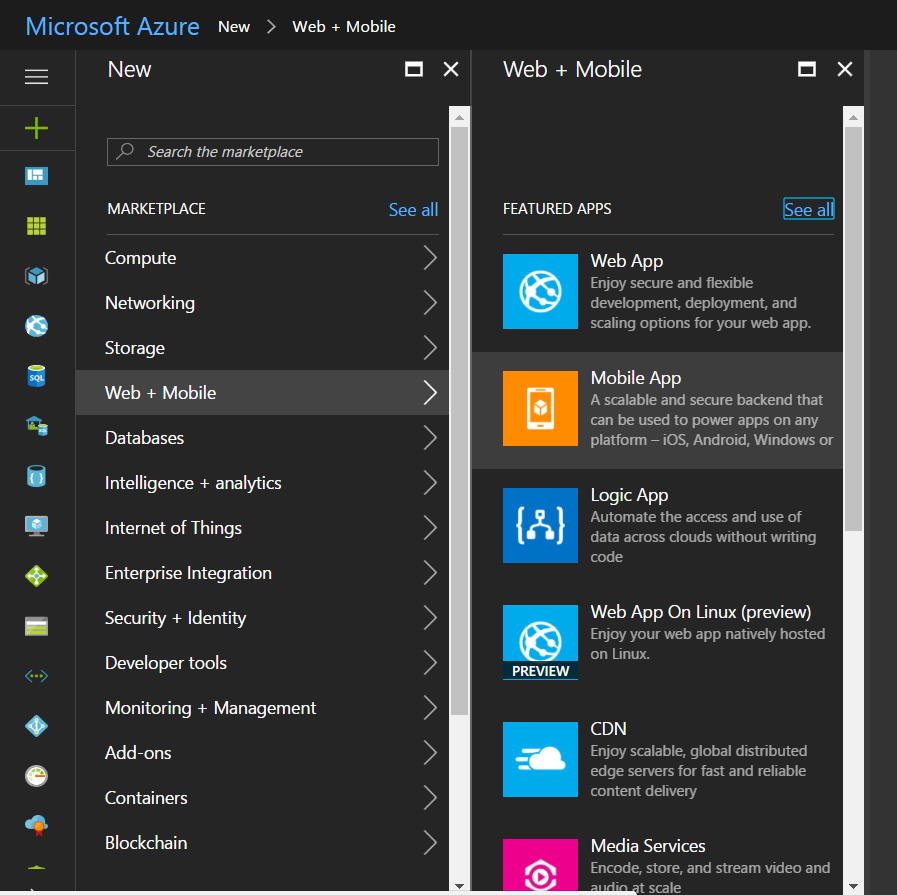
Now, we can create our Azure Mobile App. To create a Mobile App, click New, then you can either search for ‘Mobile App’ or click Web + Mobile, then select Mobile App.
Once Mobile App is selected, you can now fill out the required details. You will have to give a name, the subscription, the resource group, and an App Service plan (Standard would suffice). You can also enable the Application Insights to track things about your services such as diagnosis of issues and your users’ interaction with it.
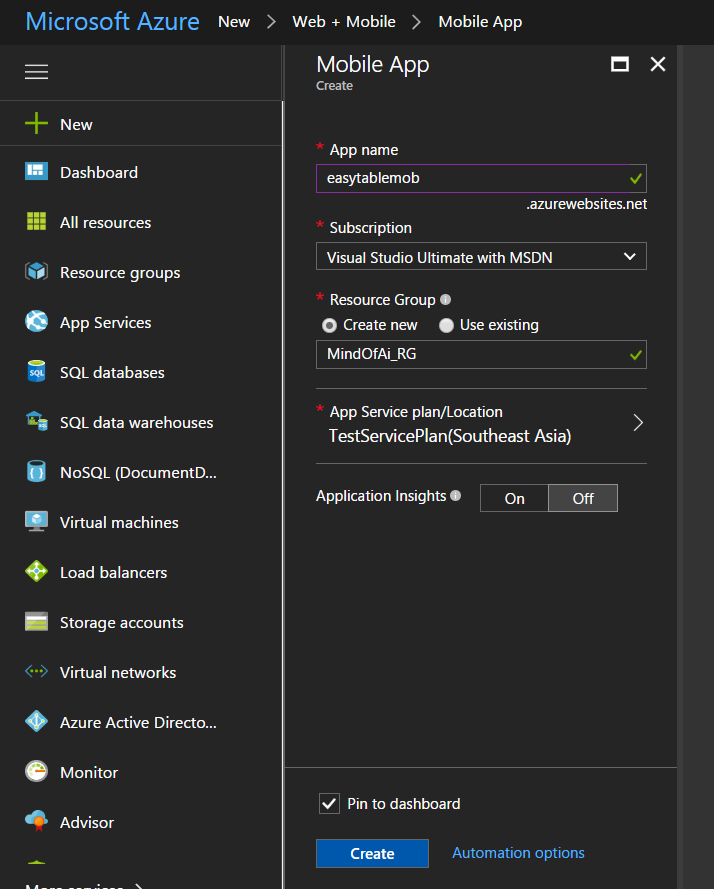
After filling this out, you can now click Create. This will take a while to create, but after a period of time, you should see this.
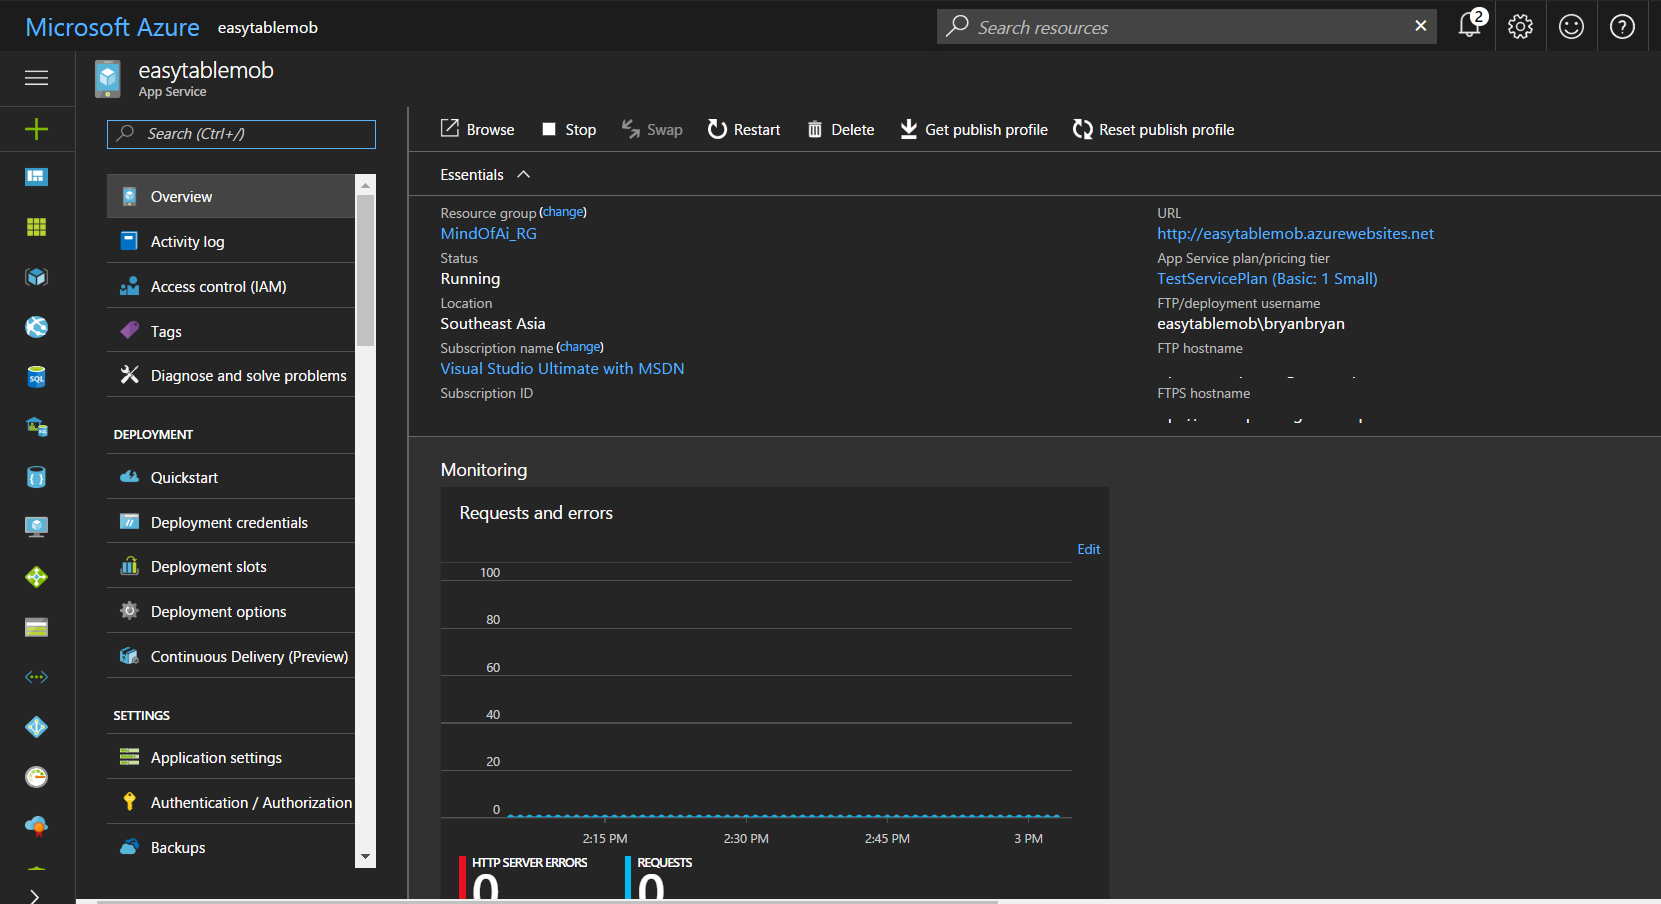
This means we’ve already created our Mobile App. Now, we can set up our Easy Tables!
Initializing Easy Tables
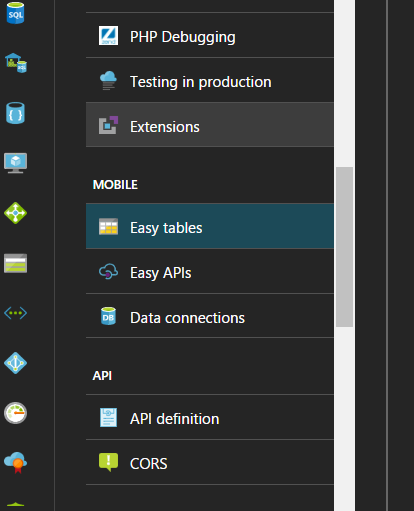
Initializing the Easy Tables is, ofcourse, really easy and also fast. To do this step, go to the Mobile Section of our Mobile App and select Easy Tables.
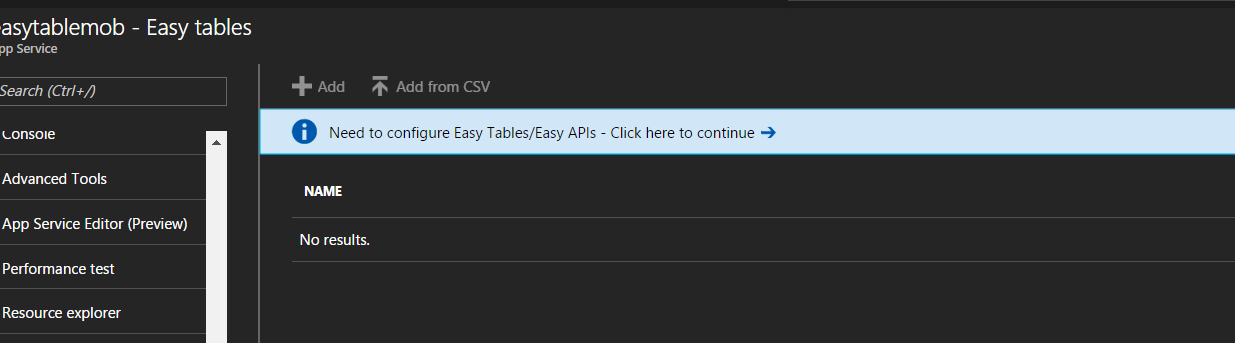
Once Easy Tables is clicked, this blade will appear. Click the ‘Need to configure Easy Tables…’ notification which is being shown at the top. It will navigate you to another blade wherein you set your Easy Tables’ data connection and initialize the Mobile App’s Easy Tables.
Adding Data Connection for your Easy Tables
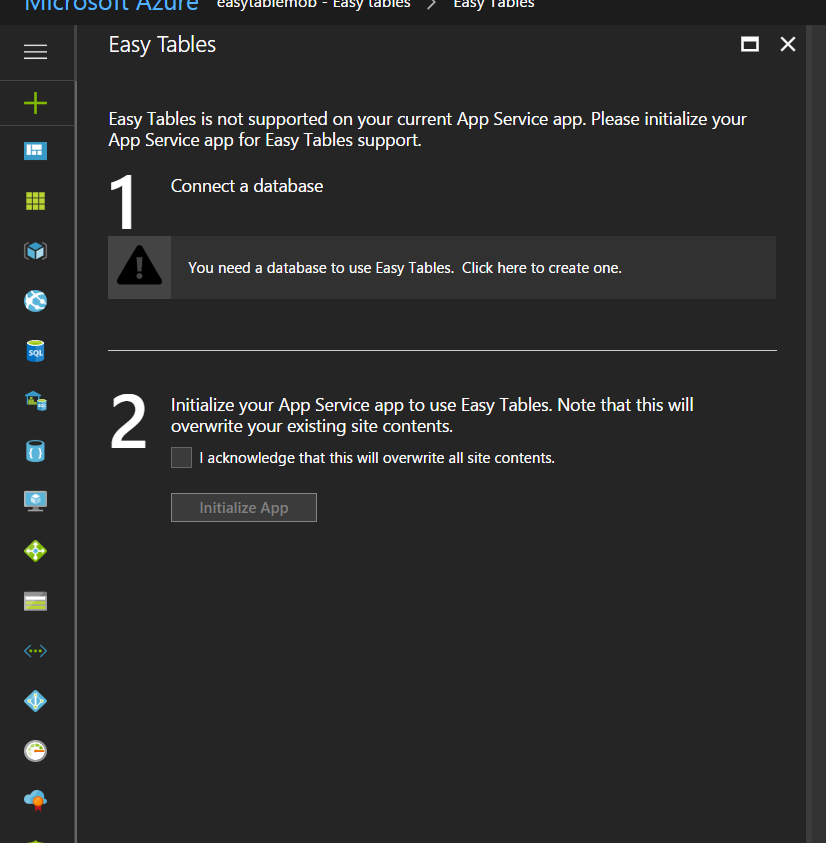
The first step in initializing your Easy Tables is to add a data connection. As of now, you can only add Azure SQL Databases. Click the button below the ‘Connect a Database’ and you can now create a connection to an existing database or you can create one. We’ll just create an empty Azure Database.
After clicking the button, you can just click Add, select SQL Database, and create a new one.

You will have to configure the details for the Database name and the server it’s going to be in. After that, click Select. This will also automatically create a connection string for you. Ideally, you will have to type in your server’s username and password, but with Easy Tables, it will be already set up for you. You can now just click OK to finish things up.
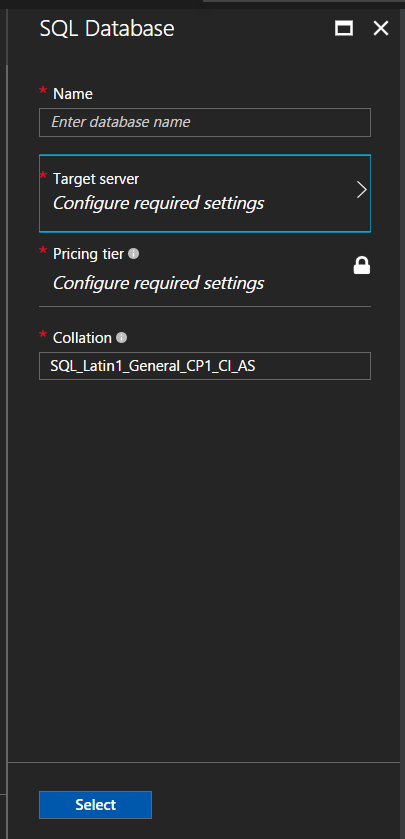
It will just take a while, because this will create not only the database (and even the server if you created a new one), but also the data connection for your Easy Tables.
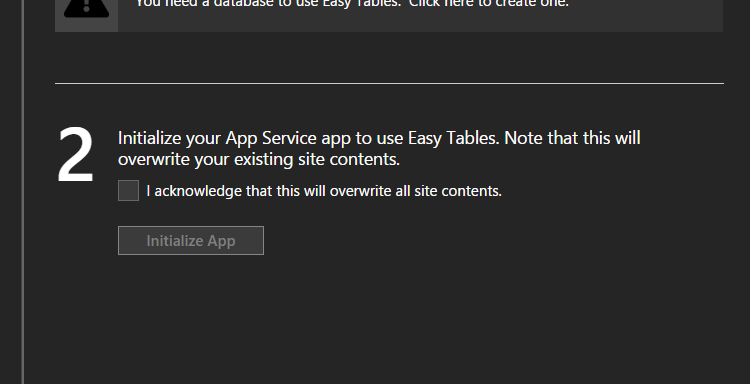
Finally, you will be navigated back to the Initialization of Easy Tables. The next step is just the acknowledgement of the creation of Easy Tables. All you have to do is to click the checkbox, then click Initialize App and you’re all done.
We can now add tables for our Easy Tables.
Adding Tables
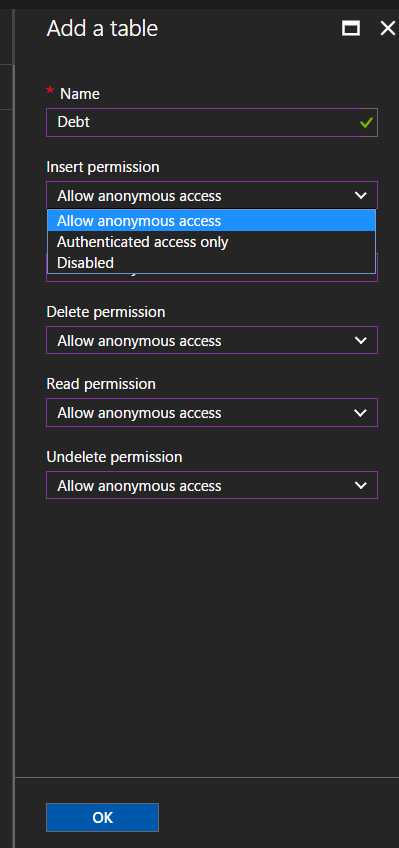
After a few moments, we’re now ready to create our first table for our Database. You can call it anything you want, but I already have an existing DataModel named Debt. The beauty of Easy Tables is that it automatically updates your columns in the tables dynamically based on the data we pass in. You can also set the permission for each method. You can select from three access permissions: Anonymous, Authenticated users (wherein only authenticated users can access your tables), or even disable any access. We’ll select anonymous for now then click OK.
Now, our backend is fully set up. You can actually try to retrieve the table data like a REST API with the endpoint http://<urlofazureapp>/api/tables/<nameoftable>?ZUMO-API-VERSION=2.0.0.
Trying out your backend
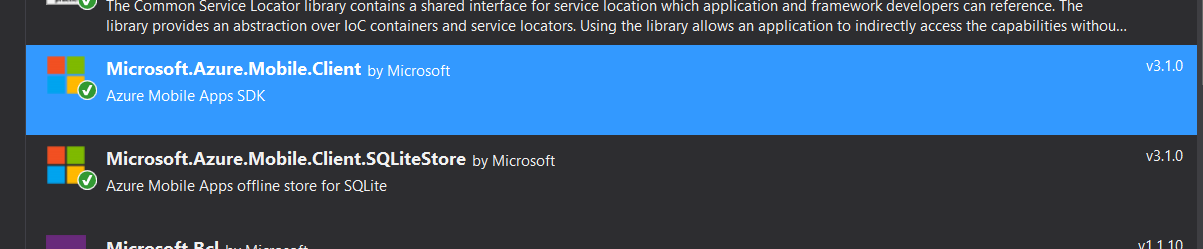
To integrate our mobile app into our Xamarin application, we need to firstly add the Azure Mobile App SDK Nuget Packages. The Microsoft.Azure.Mobile.Client lets you connect to your Azure Mobile backend and the SQLiteStore enables you to add full online/offline synchronization. Both of this should be added in all projects (PCL/Shared and all platforms):
Next step is to add this line of code on your platform projects. For iOS, add this to the FinishedLaunching method of AppDelegate class. For Android, add this to the OnCreated method of MainActivity class:
Microsoft.WindowsAzure.MobileServices.CurrentPlatform.Init();
SQLitePCL.CurrentPlatform.Init();
This is to initialize the Azure Mobile Client SDK on your platform projects. Now, we can finally create a Data Model that we’ll use locally to map the data from our backend. First, it should have the same name as the created table and a string of Id property should be added. This ensures the Mobile App SDK to identify that the data model can be mapped from the backend. This is how my Debt class looks like:
  public class Debt
    {
        [Newtonsoft.Json.JsonProperty("Id")]
        public string Id { get; set; }

        public string Name { get; set; }

        public double Amount { get; set; }

        public bool IsPaid { get; set; }
    }
Creating the Service
Finally, we can now create our service that will use the Mobile App SDK to integrate with our Mobile App backend. This will enable our app to read, insert, delete, and modify data locally and synchronize it to our backend. We will put all of this in a single class.
AzureMobileService class
First, create a class named AzureMobileService. Then, create a method named Initialize() and two properties: MobileServiceClient and IMobileServiceSyncTable.
public class AzureMobileService
    {
        public MobileServiceClient Client { get; private set; }
        private IMobileServiceSyncTable<Debt> debtTable;

        private async Task Initialize()
        {
        }
    }
Initialize()
In our Initialize() method, we will initialize our MobileServiceClient and SyncTable. This needs to be called only once. We need to pass in the base url of our Mobile App and specify the path of our local database:
private async Task Initialize()
        {
            Client = new MobileServiceClient("https://<mobileappname>.azurewebsites.net");

            var path = Path.Combine(MobileServiceClient.DefaultDatabasePath, "debtsync.db");

            var store = new MobileServiceSQLiteStore(path);

            store.DefineTable<Debt>();

            await Client.SyncContext.InitializeAsync(store);

            debtTable = Client.GetSyncTable<Debt>();
        }
SyncDebt()
Next step is to sync our local database and our backend. We’ll do that by creating a SyncDebt() method. This will be called every time we make updates or calls to our table.
private async Task SyncDebt()
        {
            await debtTable.PullAsync("allDebt", debtTable.CreateQuery());
            await Client.SyncContext.PushAsync();
        }
GetAllDebts()
We can just call our table data like this. Again, we’ll need to sync our data every time to make our data as latest as possible.
public async Task<List<Debt>> GetAllDebts()
        {
            await SyncDebt();
            return await debtTable.ToListAsync();
        }
AddDebt()
We can insert data like this. This is almost the same as how you will have to do it with update and delete. Again, we’re syncing right after the changes from our backend.
public async Task<bool> AddDebt(Debt debt)
        {
            try
            {
                await debtTable.InsertAsync(debt);
                await SyncDebt();
                return true;
            }
            catch
            {
                return false;
            }
        }
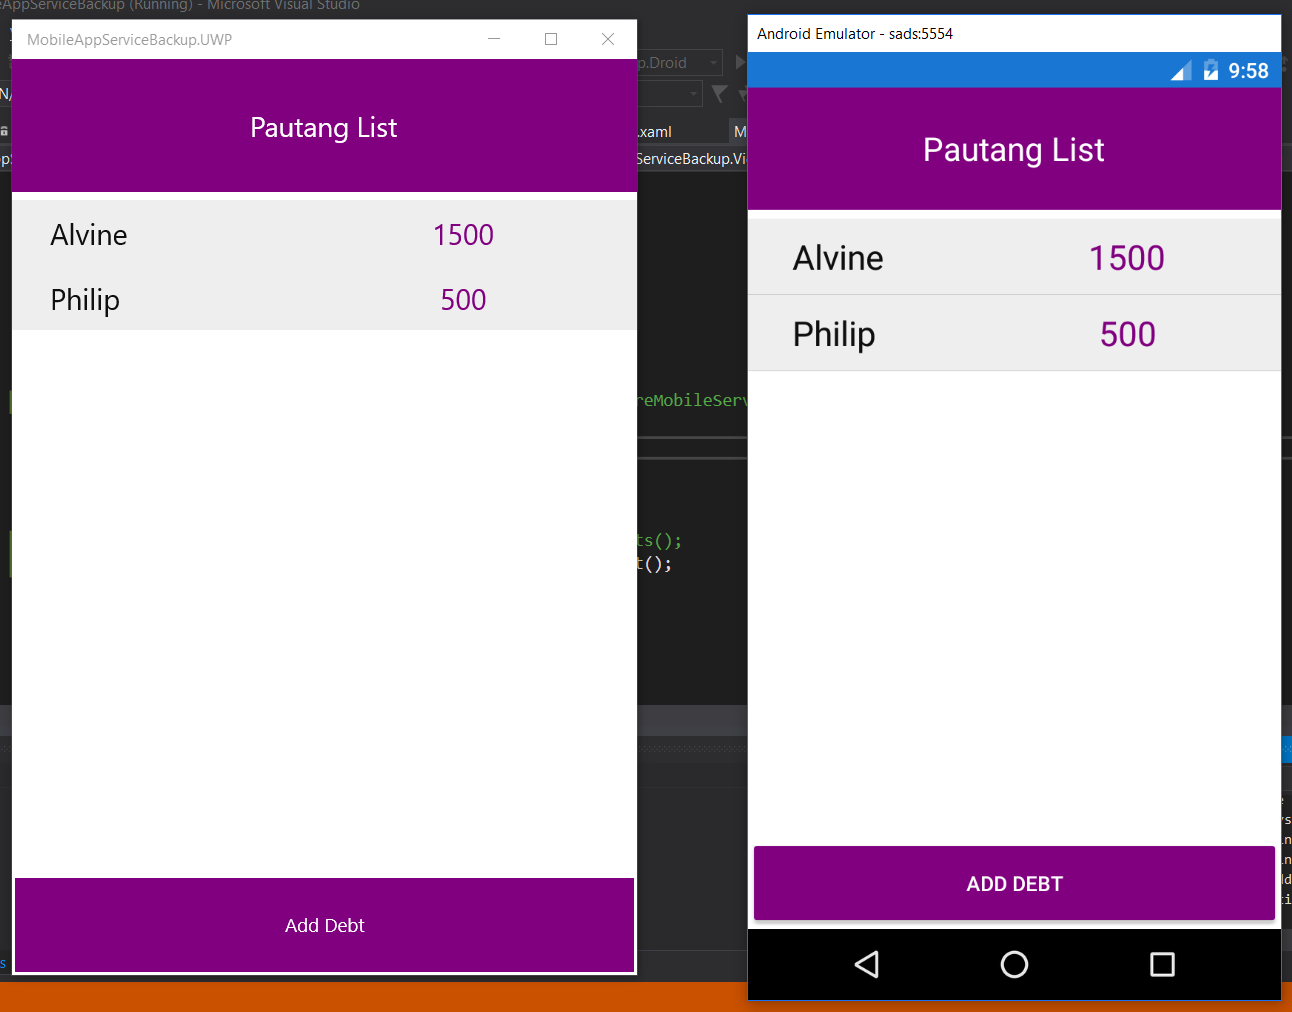
Running the App
Finally, we can now see the list of people with debts and insert others with or without network connection! You can actually try it out. Here’s the github repository.
Slide
Also, here’s the slide that I’ve used last week:
Cheers!